Monday, March 28, 2016

One Happy Camper

So my kiddos are on Spring Break this week, and we've decided to take out our much-neglected RV for a little road trip.  If you're anything like me, when planning for travel, the first packing plans involve what crafty projects to bring along.

Usually, I bring knitting...I always have a few projects in various stages of non-completion at any given time, so there's usually not much to think about.  But this time, I wanted to quilt.  At first I planned on bringing my current hand-piecing project:
Hand-pieced 8 point stars in "Aloha Girl"
I have been working on this project since like November, 2015, and I started it so I would have something to do on the looong 1 1/2 hour car rides to LA to watch my fave hockey team the Kings. We watch hockey games at home too, and while sitting on the couch, I'll pull out my little bag to work on my stars during the 20-minute intermissions.  I guess it's my hockey project!
(Note the hand-knit beanie w/ponytail hole) We LOVE our goalie, Jonathan Quick!!  Go Kings Go!!
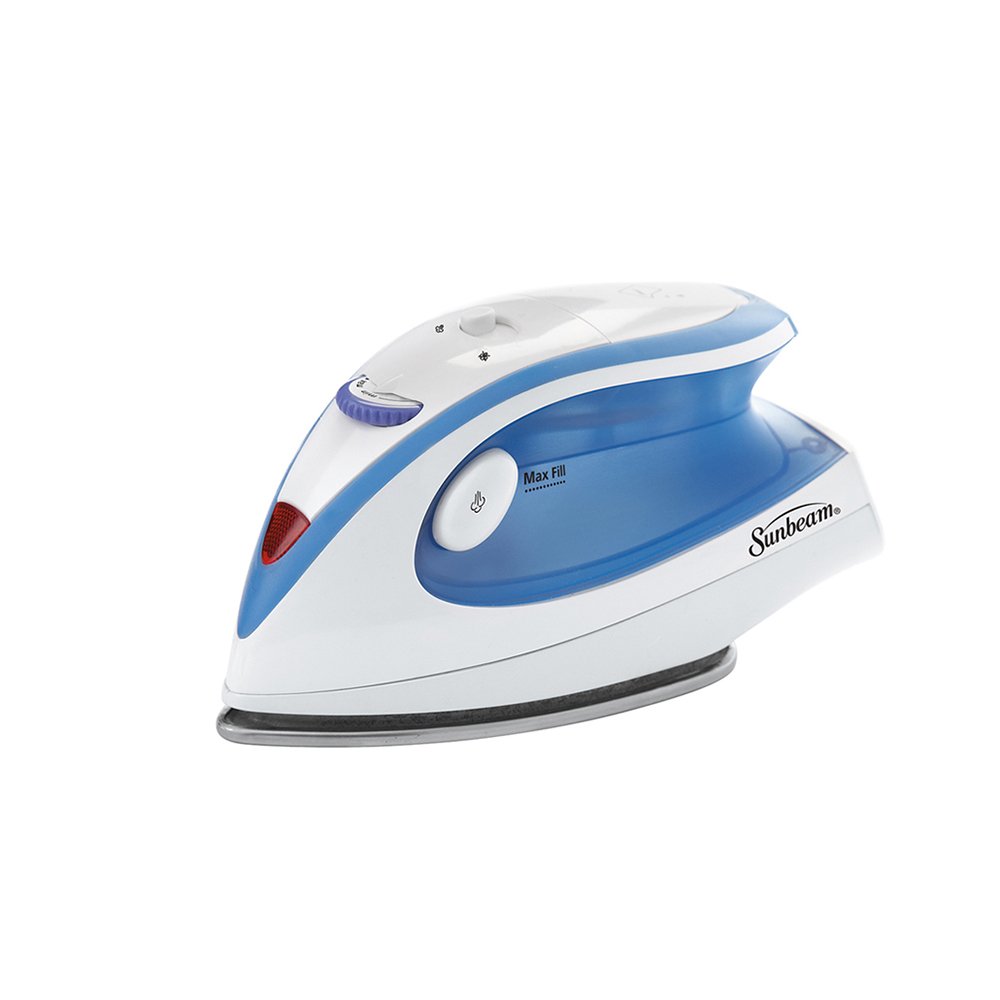
So as I was saying, I was planning on bringing this project camping.  But then I saw a pic on Facebook of a quilter who was sewing on a small old Singer in the passenger seat of her car.  What a genius idea!!  So I did an Amazon search (I love that website!) for a small machine.  I decided to take a chance on a mini sewing machine that can be plugged in or run on batteries, for around $15...how could I lose?  Of course I had to grab a mini iron too!
So, for under $30, I had a machine and an iron I could take with me in the RV.  A while ago I had bought a June Taylor Cut and Press (cutting mat on one side, ironing pad on the other) with a 60% off coupon from Joann's, so I was set with travel equimpment!  Now, what to sew?  I dove into my stash:

How appropriate is this adorable "Happy Camper" panel from Riley Blake?  I have 2 coordinating charm packs, so I'm trying to figure out a pattern to incorporate all of this cuteness.  Something rugged or campy, so probably involving a bear paw, a leaf, or a 4- or 9-patch.  Obviously, I'm not sure yet.  But I kind of have an idea.
The PERFECT camping set up!!
I already tried out my machine & iron, and both work great!  The machine is kinda loud, but it stitches, and aligning fabric with the presser foot edge yields a perfect scant 1/4" seam.  Can't wait to play with my new toys on the road!  But I'll bring my hockey project...you know, just in case! :-)


Sunday, March 27, 2016

Owls and Hearts and Flowers, Oh My!

Two gals at work are expecting their first babies about 3 months apart from each other!  Besides being so exciting, this is good news for me, since it means I'll have time to make both of the new babies a quilt!  My go-to baby gift has always been a hand-knit little beenie shaped like an apple, complete with stem & leaf...unfortunately, I have no pics, but you'll have to use your imagination.  They are super-cute!

But I have since learned quilting, so these new little people will be benefitting from my already-sizeable fabric stash.  Now, I'm not a girly-girl by any stretch, but I saw this fabric months ago, and although I didn't have any idea what I'd use it for, I bought charm packs:
Riley Blake Happy Flappers!  Look, non-creepy owls!! 
I LOVE Riley Blake fabric!  The prints are so darn cute and cheery, and the colors are...happy!  

So, "Happy Flappers" fabric will be perfect for the baby girl due in May.  Then I agonized for days over what pattern to use.  I wanted it to be easy, but not boring.  I also didn't want to cut my cute charms any smaller, because the adorable prints need to shine!  So, I finally settled on this one:

It's a free pattern from Craftsy, so click the pic to get your own.  Cute, right?  And it meets all of my other requirements and finishes at 40" square.  Perfect!  But after reviewing the pattern, I realized there's a catch: the pattern is written using squares bigger than my 5" charms.  Therefore, my quilt would only end up only about 30" square...not quite large enough.  So what to do?

I'm an ESTP Meyers-Briggs personality type, so I HATE planning, but I'm also practical and analytical.  So, I've found that when it comes to quilting patterns, I usually just figure it out as I go along, coming up with each step on the fly.  Here's what I started with:
Approx 28" Charm Square Heart
This used 16 white 5" squares plus 30 color charms, 10 of which had to be sewn to 10 of the white squares right across the diagonal.  Because the cut-off pieces from these half square triangles were so large, I sewed the left-over HST's together into squares for use in some unknown future project...a little trick I learned from Jenny Doan of Missouri Star Quilt Company in this "Serendipity Quilt" tutorial (I told you she's fantastic!).

Anyway, I pressed the seams of each row in opposite directions so I could "nest" them together, and I think I did a pretty good job of lining everything up.  Of course I agonized about the placement of the blocks, and re-arranged them about a jillion times, but at some point, it's gotta end.

So, now to add some size!  I cut the remaining 12 charms from the charm pack in half, thinking to put a 1" white border all the way around, then a 2" scrappy border around that.  But the math for the vertical border gave me a headache (we hates the maths), so I came up with this instead:
1" white border on top & bottom, 2" scrappy border on top & bottom, then 2 1/2" white border all the way around.  This added about 10" to the length, and 4" to the width.  Not too bad.

I must mention that when I buy pre-cut fabrics, I will usually also pick up a yard or so of one of the prints which I especially love.  In this case, it was the brown print that looks like a bunch of owls peeking out of a tree trunk.  So I slapped a 4" border (will be 3 1/2" finished) around this whole thing:
TA-DA!

See those HST corners?  Those are left-overs from cutting the larger HST's for the heart, and I was so happy to find a use for them so soon!  I trimmed them down to 4" and sewed them to the ends of the top and bottom border strips before sewing those entire strips to the quilt.  

This adorable quilt top took less than a charm pack of print fabric, a bit of white fabric, and less than a yard of border print fabric (sorry, I didn't keep track).  Not too shabby for no plan, right?  I toyed with the idea of adding applique flowers or hearts in the blank white space around the bottom of the heart, but in the end I left it alone...I think the heart should stand out.  

From here I'll back this with brown "Soft N Comfy" fabric, which is super soft and therefore perfect for a baby.  I'll use a sheet of white flannel as batting in the middle to keep the colors of the top bright, and to not add too much bulk, as the backing fabric is pretty plush on its own.  Still debating what color to bind it, though.

Quilting plan includes a loopy all-over stipple, with some FMQ hearts thrown in...it'll be my first time trying those, so I'm hoping they won't be too wonky.  Other than that, I'll use my go-to flower pattern on the white 2" border.  The baby shower is on April 9, so I gotta get this thing done!