Showing posts with label heart. Show all posts

Friday, April 8, 2016

Patchwork Heart

I was able to finish the patchwork heart baby quilt just in time for the baby shower earlier this week!  Mama loved it, and confessed that she had been hoping I would make her a quilt, but didn't want to ask for such a labor-intensive gift.  Awwww, y'all know how fantastic that made me feel...like all of those hours spent are truly appreciated, and that my hand-made gift will be cherished, which is all we crafty peeps can hope for.  YAY!

Here are some pics!  I quilted loops and hearts in the main body of the quilt, and took a stab at quilting feathers in the colored borders and in the corners.  I am always wanting to try something new!
Ta-Da!
Quilting!
"Dream Big Little One"
This was also the first time I tried using rulers while quilting.  I've been voraciously watching YouTube videos and drooling over the work of some wondrous quilters, especially longarmer Linda Hrcka of The Quilted Pineapple and domestic machine quilter Karen Miller of Karen's Quilts, Crows & Cardinals - Red Bird Quilt Co.  Check them out, and just try to withstand the siren song of ruler quilting.  I dare you!

So for this quilt, I made up a practice quilt sandwich.  I don't know why, but it's really hard for me to "waste" perfectly good fabric and batting just for practice.  Yes, I realize that it's necessary so that I don't destroy a "real" quilt, but it still bugs me.  I dunno, just a weird hang up I have.
Feathers are tougher than they look!  I like the "bump back" technique, and my second block above (the one on the left) already looks better than my first try (on the right).  Also, I free-handed the middle "feather" on the right, but used a ruler for the one on the left.  Guess what technique I used on the quilt...
 

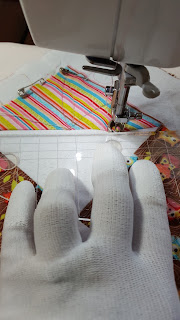
I bought a Westalee ruler foot for my machine a bit ago, along with some rulers.  I used the Quilted Pineapple's "BFF" curved ruler for the center, and also used a straight edge ruler to help with stitching in the ditch.  I don't know why. but stitch in the ditch is soooo difficult for me!  Give me loops, stipples, or any other all-over design, but don't make me SITD!  When all was said and done, I think the corners came out okay for a first try:
Horrible Stitch in the Ditch, but pretty good feather design!
Hard to see, but this is my best one!  It's true what they say, to improve I just need to practice, practice, practice!  I do know that I had fun using the rulers and I was happy with the results.  Next time I have to remember to keep the motif farther from the quilt edge to allow adequate room for the binding.  Ooopsy!

So, the whole ruler experience has been an encouraging one.  That's why I'm looking forward to using them on this quilt:
This quilt stalled because I can't decide what to to do for the outer borders, and I'm actually not as thrilled with those sashing stars as I had thought I would be, so I'm kinda bummed.  I tried buying even more matching fabric to give me more border options, but I'm still not sure.  Over-analysis much?  I just need to figure it out and finish it up so I can start obsessing over what quilting designs I'm going to use!

Unfortunately I also need to finish this, and it has a deadline, so ruler work is on hold:

This is a velvet court gown I've been working on for 4 years which I am bound and determined to wear to Ren Faire this year!  My friend and I are planning on attending next weekend, and we've made a pact that we will be wearing our gowns, even though as I write this neither one of us is done with our outfits.  I still have to make the sleeves, make a chemise, make a matching bag of some kind, and come up with some type of period-appropriate headpiece, quite possibly a fancy little flat cap.  But I'd so much rather be quilting!!! ;-)


Sunday, March 27, 2016

Owls and Hearts and Flowers, Oh My!

Two gals at work are expecting their first babies about 3 months apart from each other!  Besides being so exciting, this is good news for me, since it means I'll have time to make both of the new babies a quilt!  My go-to baby gift has always been a hand-knit little beenie shaped like an apple, complete with stem & leaf...unfortunately, I have no pics, but you'll have to use your imagination.  They are super-cute!

But I have since learned quilting, so these new little people will be benefitting from my already-sizeable fabric stash.  Now, I'm not a girly-girl by any stretch, but I saw this fabric months ago, and although I didn't have any idea what I'd use it for, I bought charm packs:
Riley Blake Happy Flappers!  Look, non-creepy owls!! 
I LOVE Riley Blake fabric!  The prints are so darn cute and cheery, and the colors are...happy!  

So, "Happy Flappers" fabric will be perfect for the baby girl due in May.  Then I agonized for days over what pattern to use.  I wanted it to be easy, but not boring.  I also didn't want to cut my cute charms any smaller, because the adorable prints need to shine!  So, I finally settled on this one:

It's a free pattern from Craftsy, so click the pic to get your own.  Cute, right?  And it meets all of my other requirements and finishes at 40" square.  Perfect!  But after reviewing the pattern, I realized there's a catch: the pattern is written using squares bigger than my 5" charms.  Therefore, my quilt would only end up only about 30" square...not quite large enough.  So what to do?

I'm an ESTP Meyers-Briggs personality type, so I HATE planning, but I'm also practical and analytical.  So, I've found that when it comes to quilting patterns, I usually just figure it out as I go along, coming up with each step on the fly.  Here's what I started with:
Approx 28" Charm Square Heart
This used 16 white 5" squares plus 30 color charms, 10 of which had to be sewn to 10 of the white squares right across the diagonal.  Because the cut-off pieces from these half square triangles were so large, I sewed the left-over HST's together into squares for use in some unknown future project...a little trick I learned from Jenny Doan of Missouri Star Quilt Company in this "Serendipity Quilt" tutorial (I told you she's fantastic!).

Anyway, I pressed the seams of each row in opposite directions so I could "nest" them together, and I think I did a pretty good job of lining everything up.  Of course I agonized about the placement of the blocks, and re-arranged them about a jillion times, but at some point, it's gotta end.

So, now to add some size!  I cut the remaining 12 charms from the charm pack in half, thinking to put a 1" white border all the way around, then a 2" scrappy border around that.  But the math for the vertical border gave me a headache (we hates the maths), so I came up with this instead:
1" white border on top & bottom, 2" scrappy border on top & bottom, then 2 1/2" white border all the way around.  This added about 10" to the length, and 4" to the width.  Not too bad.

I must mention that when I buy pre-cut fabrics, I will usually also pick up a yard or so of one of the prints which I especially love.  In this case, it was the brown print that looks like a bunch of owls peeking out of a tree trunk.  So I slapped a 4" border (will be 3 1/2" finished) around this whole thing:
TA-DA!

See those HST corners?  Those are left-overs from cutting the larger HST's for the heart, and I was so happy to find a use for them so soon!  I trimmed them down to 4" and sewed them to the ends of the top and bottom border strips before sewing those entire strips to the quilt.  

This adorable quilt top took less than a charm pack of print fabric, a bit of white fabric, and less than a yard of border print fabric (sorry, I didn't keep track).  Not too shabby for no plan, right?  I toyed with the idea of adding applique flowers or hearts in the blank white space around the bottom of the heart, but in the end I left it alone...I think the heart should stand out.  

From here I'll back this with brown "Soft N Comfy" fabric, which is super soft and therefore perfect for a baby.  I'll use a sheet of white flannel as batting in the middle to keep the colors of the top bright, and to not add too much bulk, as the backing fabric is pretty plush on its own.  Still debating what color to bind it, though.

Quilting plan includes a loopy all-over stipple, with some FMQ hearts thrown in...it'll be my first time trying those, so I'm hoping they won't be too wonky.  Other than that, I'll use my go-to flower pattern on the white 2" border.  The baby shower is on April 9, so I gotta get this thing done!