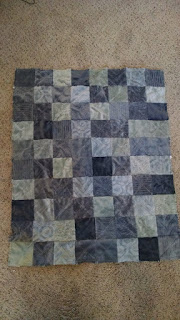
I got hooked on quilting March, 2015. I needed to make a memory quilt for my mom out of my grandmother's old t-shirts, had never done such a thing, so started scouring the internet. I found lots of tutorials on rag quilts, and the concept seemed easy enough, so I dove right in. After much uneven cutting (with scissors!), hopelessly puckered seams, and fighting with my machine, I learned much about the tricks of the rag quilt trade, including that rotary cutters, a mat, a ruler, a walking foot and spring-loaded snippers are not optional!
My very first quilt ever!!
This quilt is very comfy because it's made of mostly-cotton t-shirts on both sides, and is filled with a lofty poly batting.
Since then, I've discovered the wonder that is "
Cuddle" fabric (or
Soft N Comfy, or
Minky) to use in rag quilting. It is sooo super soft, and everyone who feels it falls in love at first touch. Seriously, go to a store and feel it! I must disclose that it is synthetic, and is somewhat tricky to work with because it likes to shift, but it's perfect for a rag quilt, especially with flannel on the other side. Here's one I did for a baby family member:
I used a multi- color/texture
Cuddle Cake (layer cake of Cuddle), cut each cake into 4ths to make 4 5" squares (more work, but way cheaper than buying it as charm packs), stuck a 5" square of cute whale flannel yardage on the other side of the Cuddle squares, and viola! Very darling! And the weight of the Cuddle and flannel together are perfect so that there is really no need for batting, especially here in sunny Southern California!

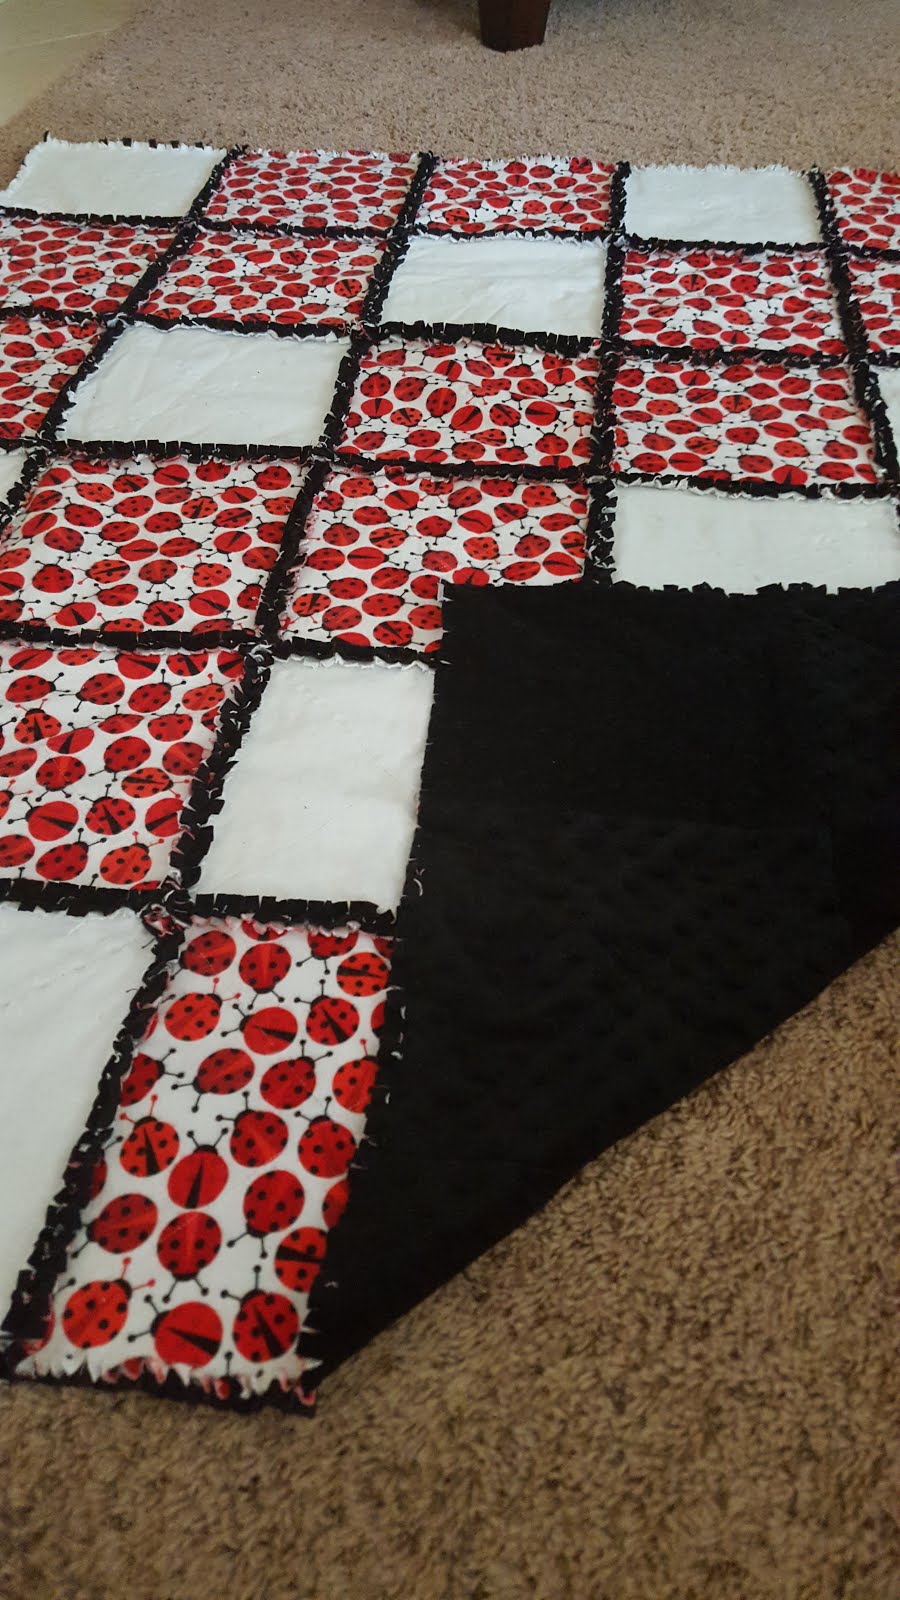
And here's one I made for my little niece, using yardage of black dotty Soft N Comfy from Joann's (I had one of those fantastic 60% off coupons) paired with lady bug and white flannel, each cut into 10" squares. I made bigger squares this time because the less of those hateful seams, the better, right?
Well, not so much on the less is better. Although this one came together much faster, in the future I would definitely cut the squares smaller; some Goldilocks measurement between 5" and 10", probably 8" max. Like it or not, I realized that the charm of the rag quilt is in those cursed fluffy ragged seams.
Again, I did not add batting, but this one doesn't feel as "cozy", which I think is due to the long spaces between the seams.
So, I've made 3 rag quilts in my almost-one-year of quilting experience. I hope to never make another, but people love these dang things, and they are pretty mindless, so the odds are good that there's a rag quilt in my future.
If there's one in your future too, I'd like to pass on advice from my limited experience. You'll notice that I've linked quite a bit of stuff, in lieu of presenting fresh and shiny-new ideas. This is because 1) work smarter, not harder; 2) this is how I learned in the first place; and 3) there's really not much more I can add to what these wonderfully smart people have already done!
Tutorials:
- I love the Missouri Star Quilt Company, and I credit Jenny Doan for getting me started/addicted to quilting, so I'll plug MSQC as much as I can...HEART her!! One of her amazing VIDEO tutorials is this Baby Rag Quilt using Minky and flannel.
- For a T-shirt rag quilt tutorial, this one from Sweet Tea in the South is very thorough.
- This VIDEO series on How to Make a Rag Quilt from Shannon Fabrics (makers of Cuddle) uses flannel and Cuddle and offers some tips and tricks along the way.
- This Rag Quilt tutorial shows how to make a quilt with cotton or flannel with batting in the middle.
- There are so many more, just search "rag quilt tutorial" on Pinterest or the web, and you're sure to find one that will sing to your heart.
So now that you've got all that down, here's some stuff that I know:
- Materials:
- I've already gone on about the Cuddle-like stuff, and it's my fave, paired with flannel. If you care about such things, keep an eye on the nap of the Cuddle, as I try to make mine run the same way. Just run your hand across it, and it becomes pretty obvious which way the nap is going. You don't have to care about the nap direction until it's time to sew your rows together. Unless you have a directional fabric, and then you'll have to line up the nap of the Cuddle with the image of your fabric on every square. Blech!
- I've seen people handle the batting issue in lots of ways: no batting, batting cut the size of the finished square, flannel used as batting, polar fleece used as batting, old sheets, etc. It looks like anything goes, and what looks/feels good to you is what's right! My friend made one with denim from old jeans as the backing. Just remember that whatever ends up in the seams is going to be ragged, so it should rag well :-)
- If working with T-shirts, remember that they are KNIT fabric, and therefore stretch if you're not careful (and even when you ARE careful).
- Oh, and I did wash and dry my flannel before cutting it for making my quilts because I was pairing it with a non-shrinking material (Cuddle). I usually don't pre-wash, but this time I did.
- Also, when figuring out the finished size of your quilt, remember that you are sewing 1/2" - 1" seams (I like 1/2"), so factor that into your measurements. After I had laid out my squares prior to sewing, I was still mildly shocked at how much smaller the sewn quilt ended up.
- Things for Cutting:

- I now use only rotary blades and mats for cutting and measuring any fabric. If you're cutting up t-shirts, having a clear square ruler the size of the squares you want would be super-fantastic too. Totally worth it. Trust me. Especially if you have a Joann's nearby, and have a 50% coupon :-)
- You could use scissors to cut your squares out, but I would never again. For my t-shirt quilt, I had cut out a cardboard square the size I wanted them to be and used it as my template. I ended up with some crooked sides, but thank goodness that the rag quilt seams are FORGIVING, and you can't really tell. But I know they're there, and that's what matters!
- Speaking of scissors, you have never experienced absolute red-hot medieval-esque torture until you have snipped your seam edges with standard Fiskar craft scissors! You need something razor sharp, and smallish. Get some spring-loaded Fiskar ragging snips like the ones I bought in this pic. Seriously! Although my hands still protest if I try to rag a quilt all at once, even using these, they don't go on strike. Oh, and I just found this style Rag Quilt Snips which look amazing, so I may just need these in my life!
- Sewing:

- When first sewing my t-shirt quilt, I would keep getting puckers on my quilt squares as I sewed the sandwiches together. This was due to the stretchy knit fabric and the pressure of my standard presser foot (which is not adjustable). I am super-cheap, and I did not want to buy the walking foot that these tutorials kept recommending. But after squares' worth of frustration, I broke down and got a generic one here. Although not absolutely perfect (you still have to sew slowly and carefully), it yielded a much better result! Basically, the grippy feet on the bottom of the foot feed the top layer of fabric at the same rate the feed dogs of your machine are feeding the bottom layer of fabric so that your quilt sandwich doesn't shift = no more puckers.
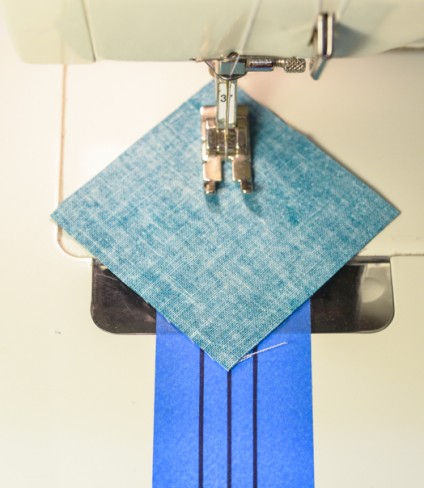
- Chain piece your squares! I would also recommend back-stitching at the beginning and end of each diagonal. Also, stick some kind of tape on the bed of your machine to mark the line of your needle, line up your squares corner to corner on the tape, and chain piece those suckers on one diagonal, and then back down the other diagonal, like this demo pic, from The Studio Blog.

- When using Cuddle-like fabric, I got the best results sewing the squares together Cuddle-side up. The fabrics shifted less.
When you're all done snipping EVERY ONE of those endless, godforsaken seam edges, don't forget that the magic happens in the washer and dryer. I first throw my quilt in the DRYER with no heat as this helps to get rid of a lot of the loose threads caused by the frayed edges prior to running all of that junk through the washer to prevent clogging my drain. Then I wash (I love my liquid Downy fabric softener) and dry.
So, although we loves the precious rag quilts and their shabby charm, we hates the seam snipping part. But they are quick, don't require too much precision, and are loved by all who receive them. If you decide to take one on, I hope that this post helps you in some little way! Rag on!


