Sunday, May 29, 2016

A Finished Quilt!!

 I hate keeping secrets.  I'm really no good at it, simply because I forget that that particular little factoid in my brain is not meant to be shared.  You've all been warned! ;-)

But when I work on a project which is meant for someone who follows me on social media, I HAVE to keep it secret.  Why?  Several reasons:
1. Surprises are fun for the recipients.  Am I right!?!
2. I don't like crafting under pressure.  If I know the recipient is "watching" my progress, it freaks me out.  
3.  I feel guilty if I post that I'm working on anything but that gift project.  And I always have multiple projects going at any given time, and I jump around depending on how I feel that day. 
4.  I don't want the recipient to feel like they have a vote in the creation process.  Like they may make a suggestion that isn't possible, or is a terrible idea, or I disagree with.  Can you say awkward?
5.  Because I'm my own worst critic, I sometimes "complain" about the projects I'm working on.  You know, like, "OMG, this block is so wonky, but whatever, I'm not re-doing it" or "I hate this quilt, it's sucking the life out of me and I want to burn it to ashes".  I could see how that could take the magic out of it for the recipient.
6.  I may change my mind about the project, chuck it altogether, and decide to make something else, perhaps causing confusion and disappointment on the part of the recipient who may have been looking forward to the original. 
7.  I may fall in love with the crafty item and decide to keep it for myself, and then just give a store-bought gift ;-).  This actually hasn't happened, but I've been really close!  

I can also see an upside, in that the recipient would actually be able to get a sense of just how much time goes into their hand-made gift.  But, really, if I'm making someone something, it's because I'm fairly certain that person is the type who will appreciate it.

Anywoo, I made a quilt for my sister-in-law.  SIL is a writer, so I know she understands the creative process.  And she's a deep thinker/feeler, which are always appreciative types too.  She's a cool peep who has done some creatively brave stuff, so she's getting a quilt!  So I bought coffee fabric with her in mind, because she LOVES coffee.  Cool, done, I'll make her some kind of quilt for her birthday with this lovely fabric.  Then, on Facebook, she hinted, not so broadly, that she would like a bookshelf quilt.  

But I didn't WANT to make a bookshelf quilt.  But, duh, it would be perfect for her.  Fine.  After agonizing over the style and design, I came up with an idea; not too realistic, not too abstract.  
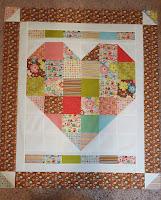
Front

Back. Don't worry, she LOVES the skulls!
I like how it came out, and I learned a lot with this one!  I dove into my stash for the fabric, and had to figure out color combos, which I am horrible at doing.  I like things super matchy-matchy, so finding contrasting "zinger" colors is really challenging.  So here are some process pics:
Choosing fabric
 

First blocks!
Rows!

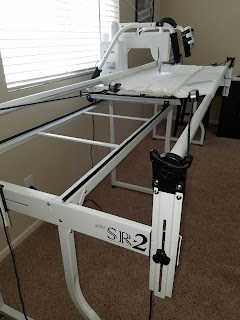
I finished the top after I got my new Grace SR-2 quilt frame, so I had to practice on the frame before even thinking of putting this baby on it to quilt.  
First time trying feathers!  So fun!
Even my little Trev gave it a try:

So I finally convinced myself that I could at least do a loopy meander, since I really needed to get this thing DONE!  Loaded it up, took a deep breath, and off I went:

So of course there are a few mistakes, which were part of the learning curve on where my quilt space limits are, and figuring out how to not trap myself :-).  I also discovered some pretty gnarly thread loops on the under-side AFTER the quilt was off, so I was upset about that, and had to go back to fix those by hand.  Still not sure what caused those, since they were sporadically spaced and there was no indication of trouble of the top.  Hopefully SIL doesn't notice them.  

So I mailed this bad boy off (late for her birthday, so it was sure to be a surprise), and when she received it, she posted an awesome FB post with a bunch of pics, and it made me tear up knowing how happy it had made her!  Woo hoo, mission accomplished!! :-)


Saturday, May 14, 2016

"Bonus Quilting", or "The Genius That is Leaders-Enders"

A while after I had started quilting, I started noticing that when I began sewing my piecing, usually when there was a seam at the start, the machine would "eat" my fabric and would bunch it all up and create all kinds of bird nest stuff on the back.  So not cool.  

In my internet travels, I learned about using a "Startie-Stoppie".  This was a scrap piece of fabric which you start sewing with, the "Startie".  Once that fabric goes through, you then chain piece your actual quilt top fabric afterward, and then run another scrap through, stopping your needle in the fabric until you're ready to sew again, the "Stoppie".  This means that any fabric-eating would happen for the scrap fabric, and not for your top fabric, because the thread was already properly tensioned for sewing once it got through the scrap. It also means that you could see any thread tension problems on the scrap before it hit your real project.  Lastly, it saves thread because you are only clipping the length between the chain-pieced pieces, not long tails. WIN-WIN-WIN!!

So I was happily Startie-Stoppie'ing along, clogging up scrap fabrics with thread and tossing them out when they were full.  Until I read THIS LIFE-CHANGING POST by that genius we all know and love, Lori Holt :-).  Go read it now...I'll wait :-)

OMG, right?!?  So basically, instead of using scrap fabric for your Startie-Stoppies, you plan ahead and actually piece another quilt between your main quilt project(s)!!!  Lori mentions fellow genius Bonnie Hunter's book on this subject called "Leaders and Enders", so check out Bonnie's blog "Quiltville" and click on her free patterns, and tutorials and everything else wonderful over there!  She is the queen of scrappy quilting.  I got her book, and it's brilliant!   

So, I planned a super-simple sampler quilt to try out this idea.  I busted out my Sizzix Big Kick machine, my 2 1/2" HST die, and cut up pieces of fabric I got from a Moda Scrap Bag.

This fabric is "Farmhouse" by Fig Tree & Co., and I paired it with Kona "Bone".  Nothing is simpler than HST's, right?  So I settled on a "Shoo-Fly", a 9-patch, a "Friendship Star", and a whirly-gig design that I don't the name of :-).  I think I'll just sew them all together diagonally (like in my colored lay-out in the pic below), but that's subject to change!

I keep all of my Bonus Quilt materials close-by and handy in a little basket next to my sewing machine.  I've been sewing them since December 2015, and they've helped me through 3 quilt tops now, as well as between the borders of my current "Bloom" blocks:

I didn't think to take pics until the heart baby quilt, so here's the Bonus Quilt in action:
Startie
Main quilt fabric
Stoppie
And as easy as that, I am now almost done with all of my blocks:

I'm still not 100% sure on the final layout, but I'll have fun playing around with options.  I bought some "Farmhouse" yardage to use as a border, so I'm excited to see how this one ends up.

In the spirit of full disclosure, this method obviously takes longer than just grabbing random scrap fabric for Startie-Stoppies because you're actually having to pre-plan, and you have to pay attention when actually making up your blocks.  But I think that little bit of extra effort to get a super-awesome bonus quilt is soooo worth it, don't you?

I've also heard of quilters working on multiple sections of their quilt top simultaneously with this method.  For example, if planning a 4-patch border, they would do those squares as Leaders-Enders, so when the main quilt top was done, the border would be done, or close to done, at the same time.  Quilters are so brilliant!


Sunday, May 8, 2016

"BLOOM" Sew-Along, Block 9 - My Style!

Today is Mother's Day, and my super-thoughtful husband "bought" (meaning we both decided) me a Grace SR-2 quilting frame for my Brother PQ 1500SL machine! 

I was really excited until I had to start figuring things out, like ideal thread tension, foot height, speed, quilt tension, quilt height, etc., since my thread kept skipping and breaking.  A lot.  I even did some FMQ on the machine by pushing a sample quilt around under the needle, just to make sure it still worked.  It did.  But I learned that I just need to slow waaaay down on the frame, and I had to adjust the afore-mentioned tensions, one at a time.  Once I did that, my practice designs started getting better, with only a very occasional skipped stitch, which is still driving me nuts!  But then, as I was just starting to get into my quilting groove, my machine started just turning off randomly.  I oiled it, and gave it and me a break and decided to make my Bloom block.  

Yes, I'm still plugging away at my Bloom quilt..I think I'm 7 weeks/blocks behind Lori at this point.  As I mentioned in my previous post, I will be replacing the "X" shaped blocks with a design of my own making.  Block 9 is supposed to be this:
Credit: "A Bee In My Bonnet". Click the pic for Lori's tutorial.
Instead, I'm going to make a patchwork flower, like this:

So, here's my applique process using Lite Steam-a-Seam2:
Pick fabrics, trace the templates onto the SAS2, cut out the shapes, stick them to the wrong side of the fabric, cut them precisely, peel off the paper backing, and stick the shapes to the background fabric.  This time, I had to sew some fabrics together for the patchwork so I could then cut out the circle shape and the leaves:

The purty patchwork flower, all ready to applique:

I did my blanket stitch around everything, except for the zig-zag on the stems, picked out some borders, and here is my Block 9:

I think it's really cute, if I do say so myself! :-)


Thursday, May 5, 2016

"BLOOM" Sew Along, Block 8...Well, Kinda

 So I should be doing this block for number 8 in Lori Holt's "Bloom" Sew Along:
Credit: "A Bee in My Bonnet".  Click the pic for Lori Holt's tutorial.
The design is pretty, but I've decided that I want to keep with the theme of flowers that actually look planted; unfortunately for this block, it doesn't look like a planted plant.  So, I created alternate designs for all 4 of the blocks in the quilt that have this "X" configuration, and I will replace those.  Yes, this means that I will be re-doing Block 2.

So I grabbed my graph paper, and came up with some what I think are cool designs, using this post from Lori's blog as inspiration.  Here's what I decided on for Block 8:
  
These flowers remind me of daffodils, so I chose fabrics that go along with that notion:

I did my template-tracing, Steam-a-Seam cutting, pressing, precision shape-cutting, and finally arranging.  I pressed the background square in half, and placed the stems so that they intersected at the half-mark.  

How cute, right?  Here's how close I came to the original vision:

I'm pretty proud of how these came out!  So after some applique:

And after the borders:

I'm all done with my alternate Block 8!  Because Block 9 is also a non-planted flower design in the pattern, check in later to see what I came up with as a replacement design... ;-)

Tuesday, May 3, 2016

"BLOOM" Sew Along, Block 7

I'm still plugging along on the "Bloom" quilt by Lori Holt of "A Bee In My Bonnet", and I am up to Block 7:

Credit: "A Bee In My Bonnet".  Click the pic for Lori's tutorial.
I thought I would be too cool for school, and just followed the pattern directions for the block without looking at the tutorial first.  As a result, I made a blue flower with a yellow center, as instructed in the pattern.  But when I saw the block that Lori had actually made on her blog, I was so jealous!  Just look at Lori's fabric choices for her block!  So cute!  I hereby vow to deviate from the pattern more often.

Okay, so I traced, cut, pressed and appliqued my way to a finished block:


Pretty painless, and it's so cute!